#kindforthesummer Interactive Bulletin Board

Screen Shot 2016-05-30 at 9.29.37 AM

On a trip to the dollar store, I stumbled across bright, neon hashtag post-its. I didn’t know what I was going to do with them at the time, but I scooped them up, hoping that I would become inspired.

Eventually, I came up with a bulletin board idea in which students write the ways they will be kind over the summer on the hashtag post-its and post them on the wall under a sign that reads, “How will you be #kindforthesummer?”

IMG_6725


I also added a social media component, encouraging the students who are on social media to make their posts positive this summer. At the beginning of next school year they have an opportunity to show me that they have posted an act of kindness on social media with the hashtag #kindforthesummer in exchange for a small prize.

IMG_6727

The students really got into this, and by the end of the first day the bulletin board was up, I already had most of the wall covered in responses!

FullSizeRender 26

Here are some of the things they wrote:

IMG_6741

IMG_6740

IMG_6739

IMG_6738


I thought this bulletin board post was extra appropriate because today begins my first official week of summer break! Woo! Don’t worry, I’ll still be blogging throughout the summer with ideas for next school year. Enjoy your well-deserved break, school counselors!


Screen Shot 2015-10-12 at 8.12.23 PM

Review: The Anxiety Workbook for Teens

Screen Shot 2016-05-12 at 4.18.54 PM

The Anxiety Workbook for Teens by Lisa M. Schab, LCSW, has been a great resource to use in my individual counseling sessions. Although it is meant for teens, I find that a lot of the concepts and activities are appropriate for middle school students as well.

One reason I love this workbook so much is that it is very CBT based, which is the primary theoretical orientation from which I operate. I have one student in particular who really connects with the CBT principle of reframing thoughts, so I used this workbook in my sessions with her. Throughout the school year, as this child battled anxiety, we covered the following topics from the workbook: “How You Experience Anxiety,” “Worrying is Worthless,” “All or Nothing Thinking,” “Overgeneralizing,” “’Should’ Statements,” and “Thought Stopping.” {There are MANY other sections of the workbook—these are just the ones I decided to focus on with this particular student.}

FullSizeRender 22

FullSizeRender 23

FullSizeRender 25

Each section typically begins with an overview or short story related to the concept presented in that chapter. The overview is then followed by an activity that reinforces the concepts and brings them to life. Finally, there is a section titled, “More to Do,” which includes open-ended questions for the child to answer about the concept and/or the activity. The final section occasionally contains homework assignments, such as thought and behavior logs.

FullSizeRender 24

While I don’t follow the book entirely with students, I do use the explanations of CBT concepts, as well as a lot of the activities. I don’t actually have the child fill out the open-ended question pages, but I use plenty of the questions verbally in session {which is great to have in those moments I feel “stuck”}.

For me, this workbook has been a helpful tool in introducing CBT concepts with my middle school students in a way they understand and connect to. The 5th grader I primarily used this workbook with has been able to manage her anxiety much better, and after a lot of practice, she is now able to identify her negative or irrational thoughts and challenge them.

This would also be a good resource to recommend to parents who want to be able to help their children manage anxiety.

You can buy the book on Amazon here: The Anxiety Workbook for Teens


Screen Shot 2015-10-12 at 8.12.23 PM

Test-Taking Skills/Testing Anxiety Workshops

Screen Shot 2016-05-06 at 6.00.26 PM

As counselors, sometimes we are given tasks that take us away from actually offering counseling services to children. I am lucky in that I do not have many of those tasks; however, this year I was given some standardized testing responsibilities that required time I would normally spend seeing my students. An important tool we can use in cases like this is to advocate for ourselves and our profession. One way that I do this is by showing the appropriate tasks I should have as a school counselor, such as helping students with test-taking skills or anxiety. This is why I created my Test-Taking Skills/Testing Anxiety Workshops.

Weeks before testing begins, I ask all homeroom teachers to send me a list of students who they think would benefit from these small group workshops. I then schedule groups of 6-8 students at a time the week before standardized testing to help them be better prepared.


The Workshop

I begin each workshop with a pre-test, gauging the participants’ feelings of readiness and anxiety.

Screen Shot 2016-05-06 at 6.02.44 PM

We then play test-taking skills bingo and talk about each skill as it is called out. {The students really seem to enjoy this game!} I created this bingo game in Word, and I’m happy to share it for free. All you have to do is ‘like’ The School Counselor Life Facebook page and e-mail theschoolcounselorlife@gmail.com to request the 10 bingo cards I made.


Screen Shot 2016-05-06 at 5.54.28 PM

After the game is over, I hand out a page filled with many of the skills included in the bingo game, as well as strategies the students can use if they need to make an educated guess {in those instances where they have NO clue what the answer is}.


Screen Shot 2016-05-06 at 6.21.50 PM

If students in the group report feeling nervous or anxious about testing in the pre-test questionnaire, the group will talk about coping skills they can use when experiencing testing anxiety. This group discussion seems to help the students feel less alone in their worries and more empowered to try ideas that were shared in the group for coping with anxiety or nerves.

We close out with a post-test, which is the same as the pre-test, with one additional question to assess whether or not the children thought the workshop was helpful.

Screen Shot 2016-05-06 at 6.02.21 PM


Workshop Data Collection

In coming weeks, I will be posting a series all about data collection, so as a spoiler, I will tell you how I use the pre and post-test data for this workshop in my final data report. I start by tallying up the students’ responses for pre and post-tests by grade level {see tests above}. If a student ranked an item as a 1, 2, or 3, I counted that as a ‘no,’ and if he/she ranked an item 4 or 5, I counted it as a ‘yes’. I then turned those numbers into percentages. {i.e. if 3 out of 12 students reported they felt confident in their test-taking abilities on the pre-test, and 11 out of 12 students reported the same thing on the post-test, then I know that only 25% of students in the group felt confident before the workshop, and 92% felt confident after.} If those were the real numbers, that would tell me that the workshop did increase testing confidence in many students.

Here are my actual numbers from this year:

Screen Shot 2016-05-06 at 6.12.24 PM Screen Shot 2016-05-06 at 6.12.34 PM


What is your role in testing at your school? Are you able to utilize your counseling training in ways such as the workshop I just described? Or are you a testing coordinator, bogged down by additional non-counseling tasks? Comment below with your ideas to advocate for the school counselor’s appropriate role in school testing. The following article is a great resource to share with your administrators if you are struggling with testing duties: https://www.schoolcounselor.org/asca/media/asca/PositionStatements/PS_High-StakesTesting.pdf


Screen Shot 2015-10-12 at 8.12.23 PM

Desk Style and Organization

Screen Shot 2016-04-18 at 4.29.14 PM


Since my job is never boring, I don’t think my desk should be either. Today, I’ll be sharing some of my favorite office accessories that liven up my desk.


FullSizeRender 21

I found these cute office supplies at Office Depot. I love how a splash of color on my desk can brighten my day!


IMG_6552

A good planner is my life saver at work. The one pictured above is also from Office Depot. Check out my previous post on How I Schedule Individual Sessions with Students to see the ways I use my planner every day.


IMG_6554

Stress balls and items for kids to fidget with while we talk are essential items in my office. The bin and its contents are all from Dollar Tree.


IMG_6555

These adorable containers {which I use to store paperwork and post-it notes} came from Big Lots, and they have really helped me stay organized. Adorable AND functional!


FullSizeRender 20

Finally, one of my favorite items on my desk is my personalized notepad. This is great for writing quick notes to teachers and parents. You can design your own at http://www.vistaprint.com


Screen Shot 2015-10-12 at 8.12.23 PM

A Middle School Anti-Labeling and Anti-Judging Activity

Screen Shot 2016-04-11 at 6.27.04 PM

Last week, I introduced a new activity with my middle school students called The Anti-Labeling and Anti-Judging Project. This experiential activity is designed to increase empathy among students and to decrease labeling and judging.

During recess and lunch time, the 7th graders {who were the leaders of this activity} all wore signs with instructions for how others should treat them during that time. Some examples of signs they wore include, “Treat me like I’m invisible,” “Treat me like you feel sorry for me,” “Treat me like you respect me,” “Treat me like I don’t fit in with you group,” and “Treat me like I’m a genius.”

FullSizeRender 19

Prior to the beginning of recess, the 5th and 6th grade students were told that there was going to be a special activity during recess and lunch, and their only instructions were that they had to interact with the 7th graders and that they had to do whatever it said on the 7th graders’ signs.

The students did a exceptional job executing this activity. Those who were “invisible” weren’t spoken to or acknowledged for about 45 minutes, and those who were “cool” were fawned over for that same amount of time.

After lunch {during which the 7th graders were mixed into the 5th and 6th grade tables}, I spent about 15 minutes processing what had happened with all of the middle school students. The 5th and 6th graders understood the purpose of the activity without being told, and seemed to have a better grasp of how labeling others can really hurt them. Since the 7th graders actually got to feel how others do, they had some powerful experiences that they shared with the group. One boy, who isn’t necessarily considered “popular,” got the sign that said, “Treat me like the coolest person you’v ever met,” and he shared that after 45 minutes of being treated like he mattered and like people wanted to be around him, he was already more confident and felt better about himself. Imagine how he would feel if other kids treated him with that level of respect and kindness EVERY DAY! Another student who got the sign, “Treat me like I don’t fit in with your group” really struggled during the activity and said that she couldn’t even imagine being treated that way on a regular basis. In that short amount of time, she already began to feel left out, not cared for, and lonely.

I closed out the activity by saying that we all wear signs like this every day…our signs just happen to be invisible. We talk about the importance of not labeling someone {especially when you don’t even know him or her}, and we discussed the power we have to bring joy or pain into the lives of others based on how we decide to treat them.

I definitely think I will repeat this social experiment, having the 7th graders lead each year. That way, they all get the experience of treating others a certain way and of being treated a certain way.


Screen Shot 2015-10-12 at 8.12.23 PM

How I Schedule Classroom Lessons

Screen Shot 2016-03-30 at 6.51.41 PM


In grad school, we learn about effectively implementing counseling lessons in the classroom but not necessarily about how to schedule those lessons. That was the struggle I faced during my first year at my current school. Because I am the first full-time counselor at this school, they didn’t really have any process for the previous part-time counselor to come into the classrooms {mostly because she only did classroom lessons a couple of times during the year}. Since I wanted to visit each classroom MONTHLY, I had to get teachers on board and figure out how to schedule them!

Lower School

I started off scheduling lower school classroom lessons by posting a calendar in the faculty lounge every month so that teachers could sign up for their preferred time {I blocked out times I knew I wouldn’t be available}. As you can imagine, the problem with this method was that teachers simply forgot to sign up, and I was spending time hunting them down so I could schedule that month’s lesson. I also realized that most of the teachers were always signing up for the same day of the week and class period each month, which led to an idea…

At the beginning of this year, I asked the lower school teachers to give me their top 3 days and times for me to present monthly lessons to their classes.

IMG_6464

Now, every month I look at those choices they gave me and create the schedule based on that. I e-mail it out every month for them to review for any scheduling conflicts.


Screen Shot 2016-03-30 at 7.13.44 PM

This system has been working WONDERFULLY this year! I no longer have to beg teachers to sign up every month, nor do they have to remember  to look out for a sign up sheet.


Middle School

I spent my first year at my current school begging for middle school teachers to volunteer their class time for me to present my lessons {since the 5th-7th grade students switch classes, I couldn’t simply take them from homeroom like I do with lower school}. This tended to work out when there was a day that a teacher had finished a unit and was not going to be moving on until the following class anyway, but it was definitely a lot of extra work and left me anxious that I wouldn’t get all of my lessons done. At the end of that school year, the assistant principal approached me with a way to work my lessons into the middle school schedule. I don’t know if she could sense my desperation or if the middle school teachers suggested it, but whatever the reasoning, it was an awesome opportunity!

Our middle school students attend Library once a week with their homeroom class, and one of those weeks every month, I present my lessons to the 5th, 6th, and 7th grade students. {Luckily the school librarian is also my work BFF, so she was totally on board with this arrangement}.

IMG_6393

I expanded this idea even further to add more middle school small groups to my counseling program. I now see every middle school student in a small group, and my groups are separate for boys and girls. I’ll be writing a post on these groups soon. The librarian and I made the following schedule: one week all students in each homeroom have library class, and the next they have a counseling lesson. The following week, I have the girls in group while the boys have library, and the next week I have the boys while she has the girls. This arrangement has worked well for both of us, and I’m so glad we figured it out!


So, that’s how I schedule my monthly lessons! It took some trial and error, but I feel that I finally have a solid system in place. Comment below with how you schedule your classroom lessons!


Screen Shot 2015-10-12 at 8.12.23 PM


Families in Transition (FIT) Small Groups – 3rd & 4th Grade Activities

Screen Shot 2016-03-23 at 4.42.09 PM

To read more about why and how I run Families in Transition (FIT) Groups, read my previous post: Families in Transition (FIT) Small Groups


This week, I terminated my 3rd and 4th grade FIT groups after 6 sessions each. For these groups, I chose activities that were more developmentally appropriate than those I use with my 5th and 6th grade groups {which are described in post linked above}.

Here are some of my favorite activities from this rounds of groups!:
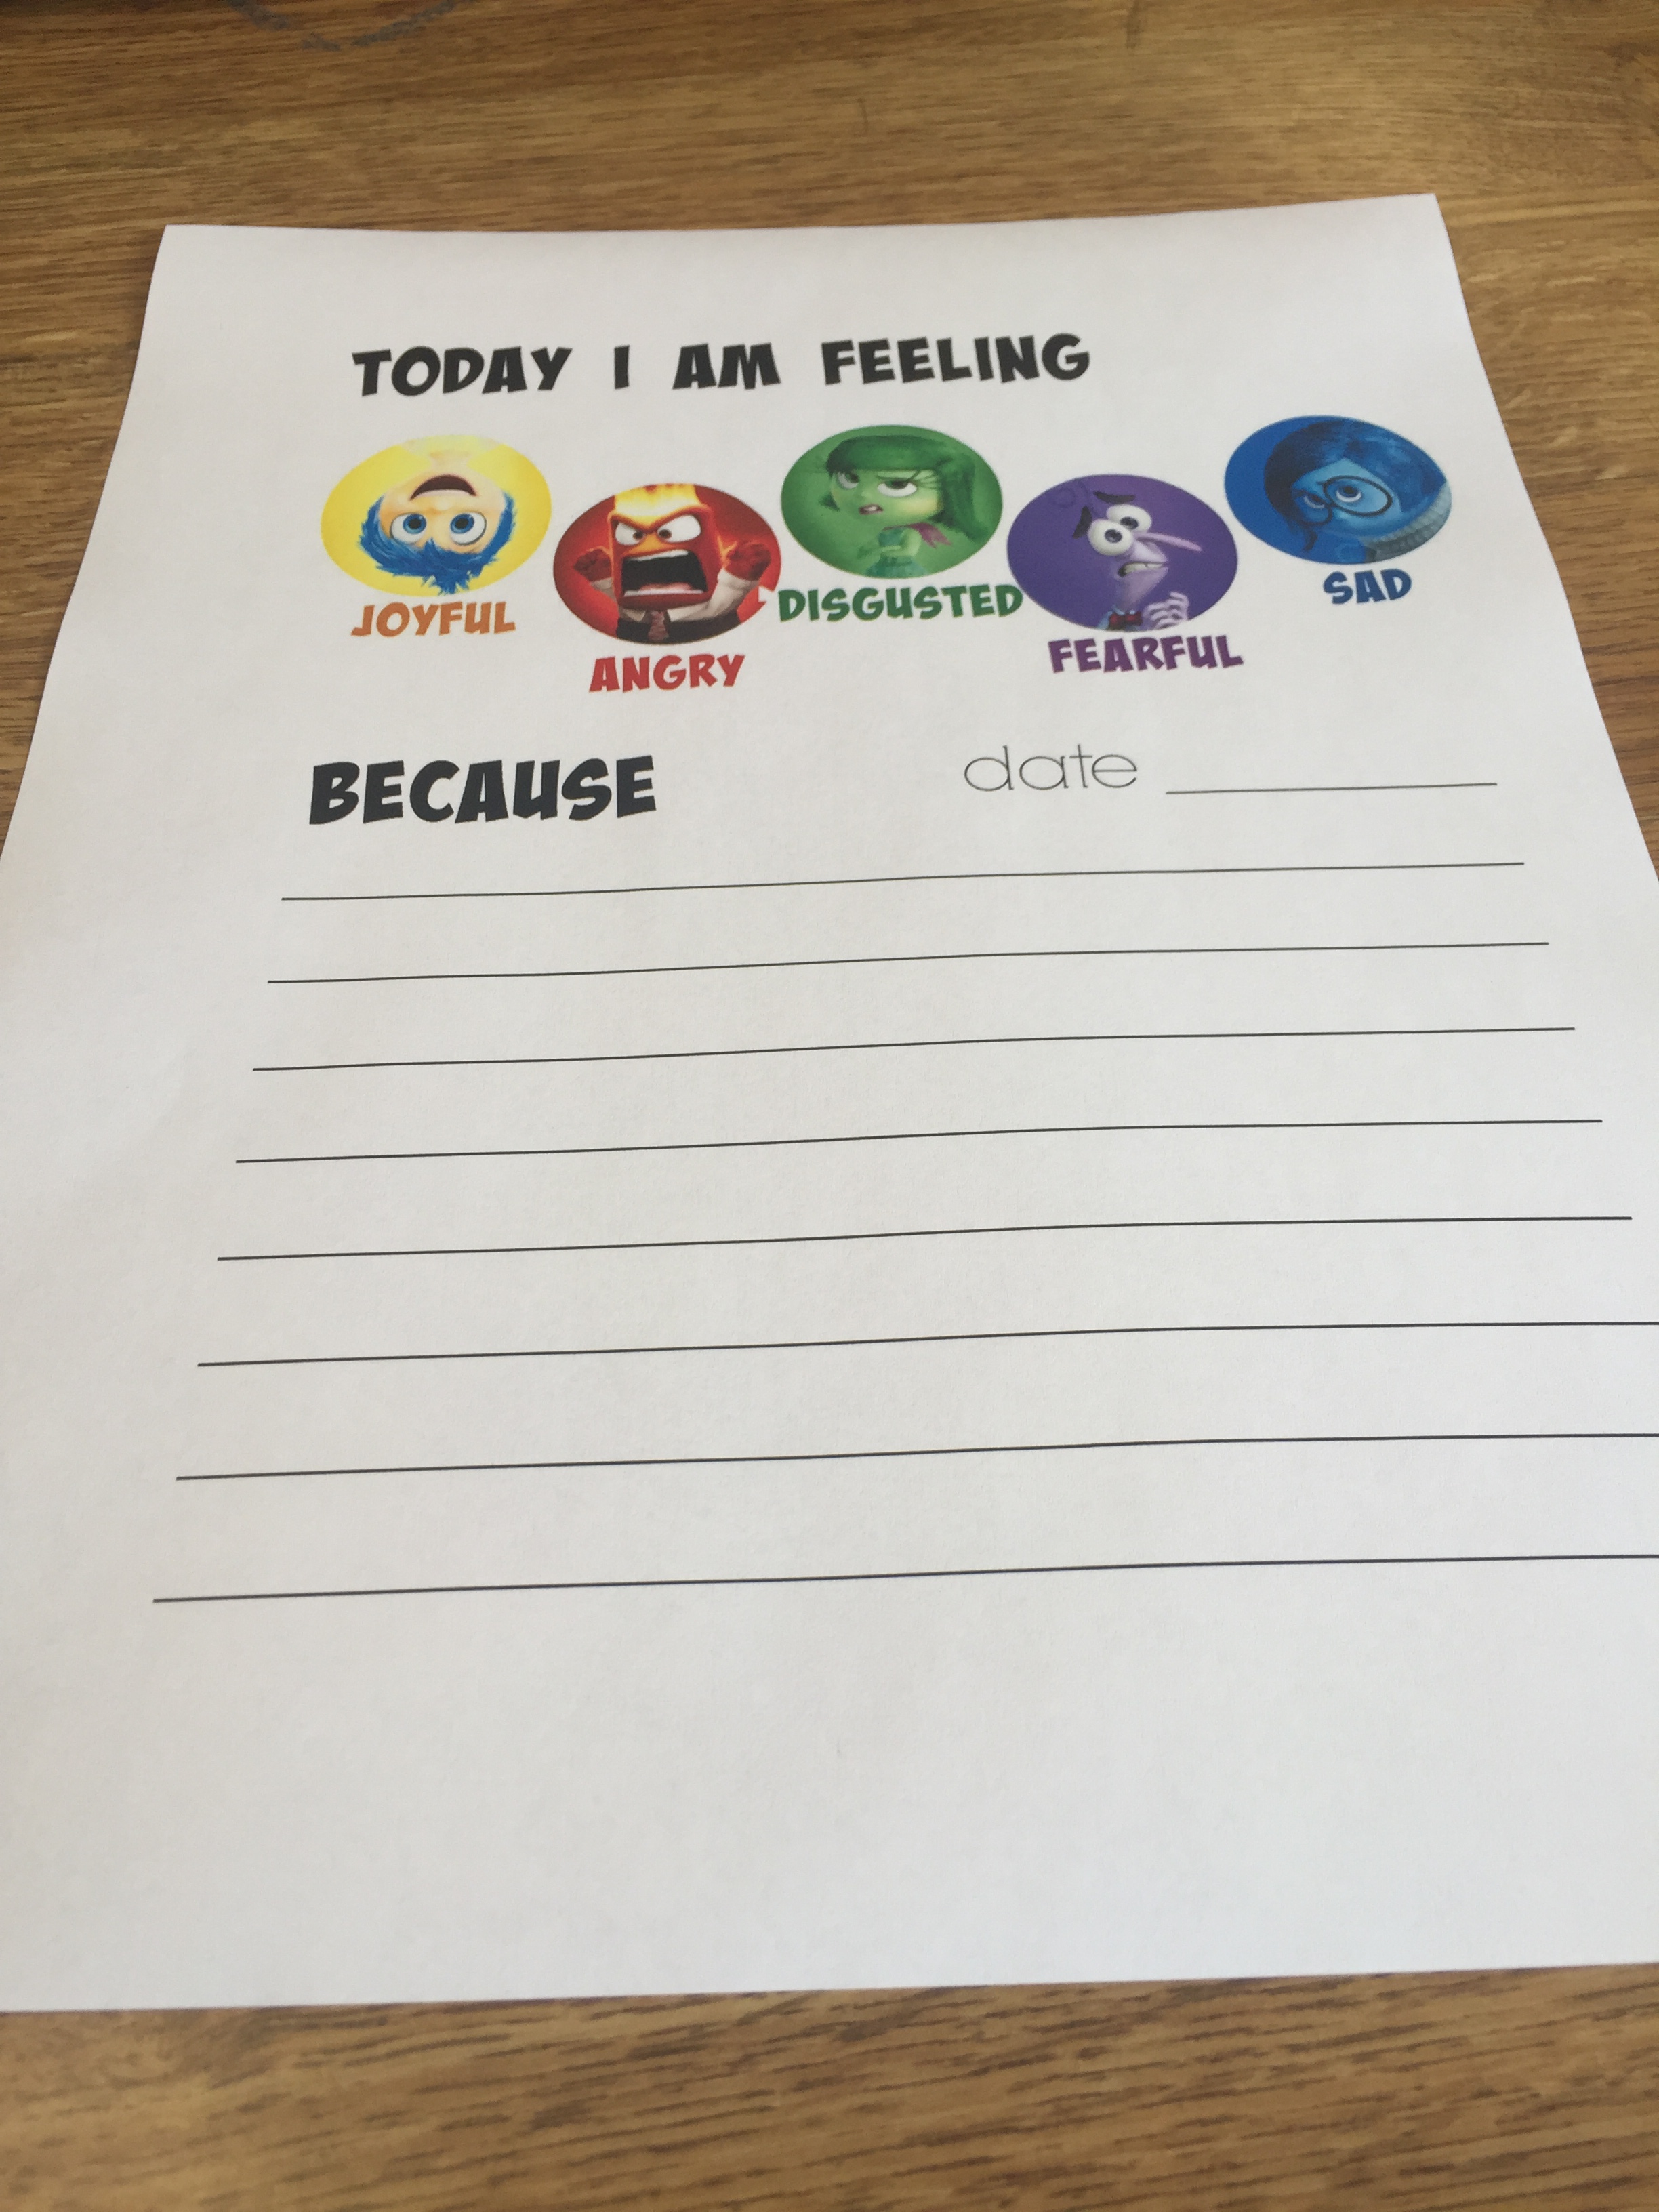
(1) Check-Ins

I start every group I run with at least a quick verbal check in, but for my 3rd and 4th grade FIT groups, I decided to use this Inside Out feelings sheet from Brie Brie Blooms:

IMG_6398

When the students come into my office, I have the feelings sheets on clipboards ready to go, so they know right away to complete a sheet. Then, we take turns sharing what we wrote with the group. I find this is an easy way to gather information at the very beginning of group. {Also, the kids really like it, which is a major plus}

IMG_6423

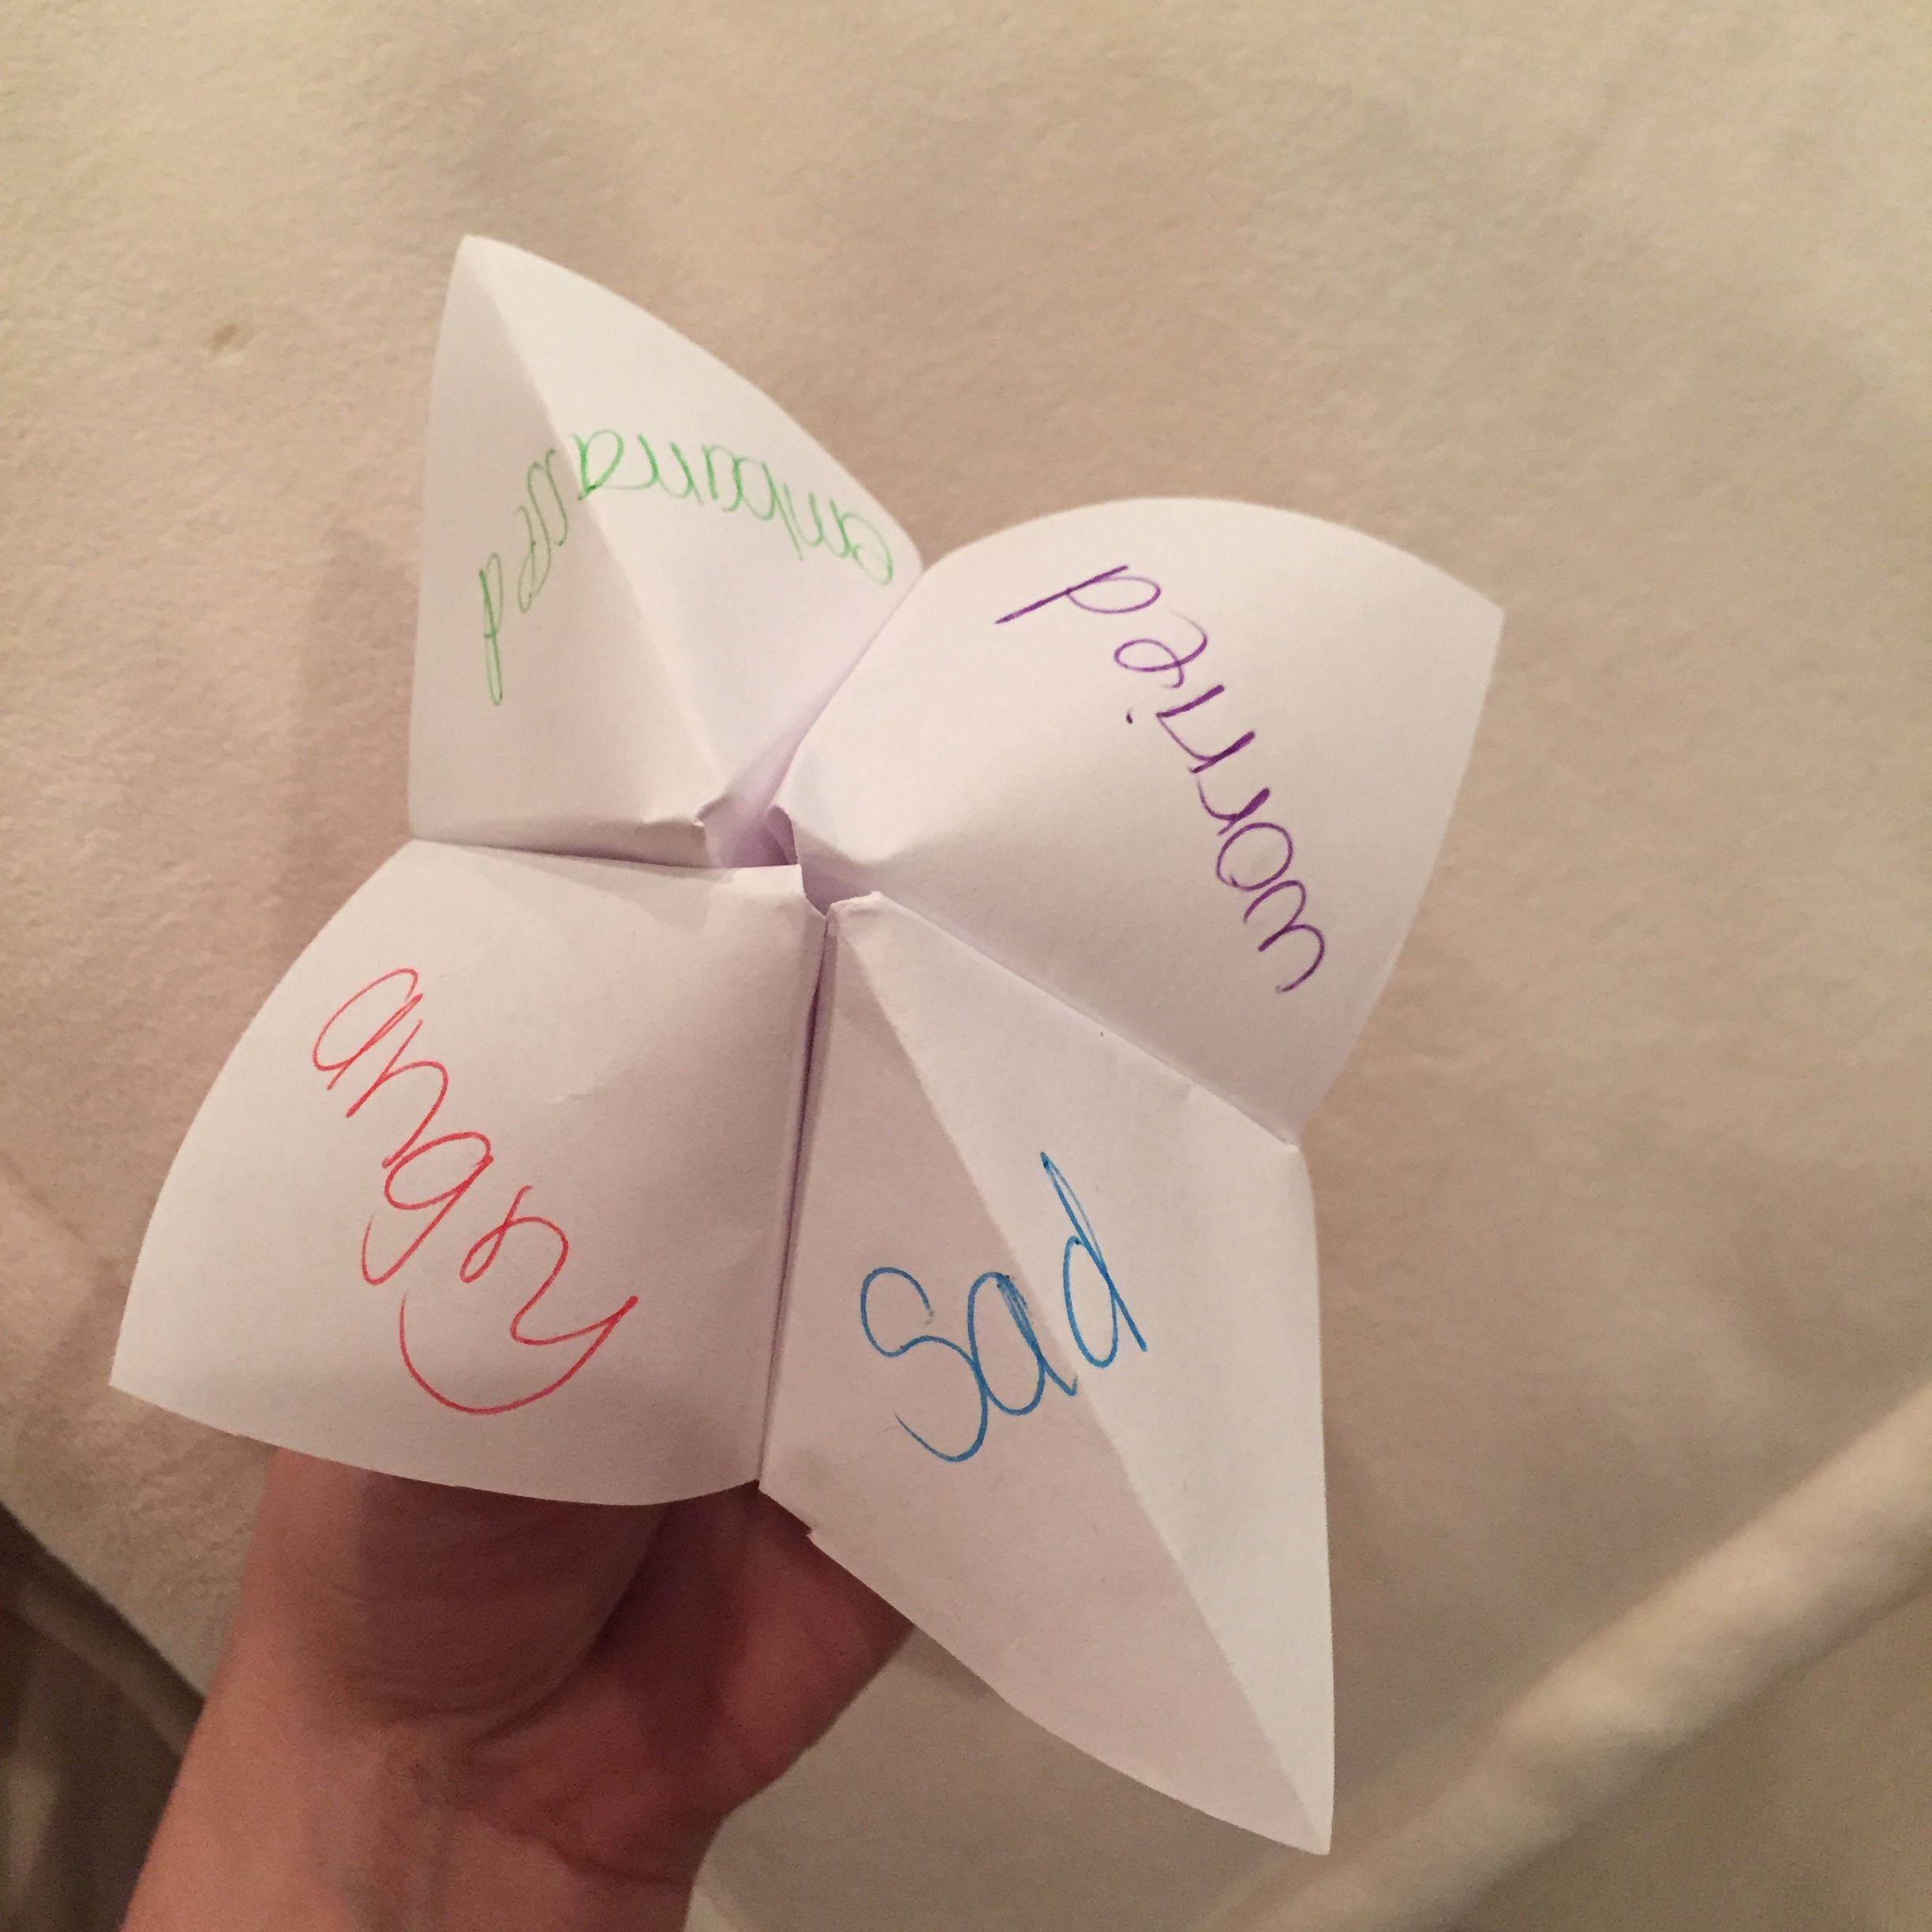
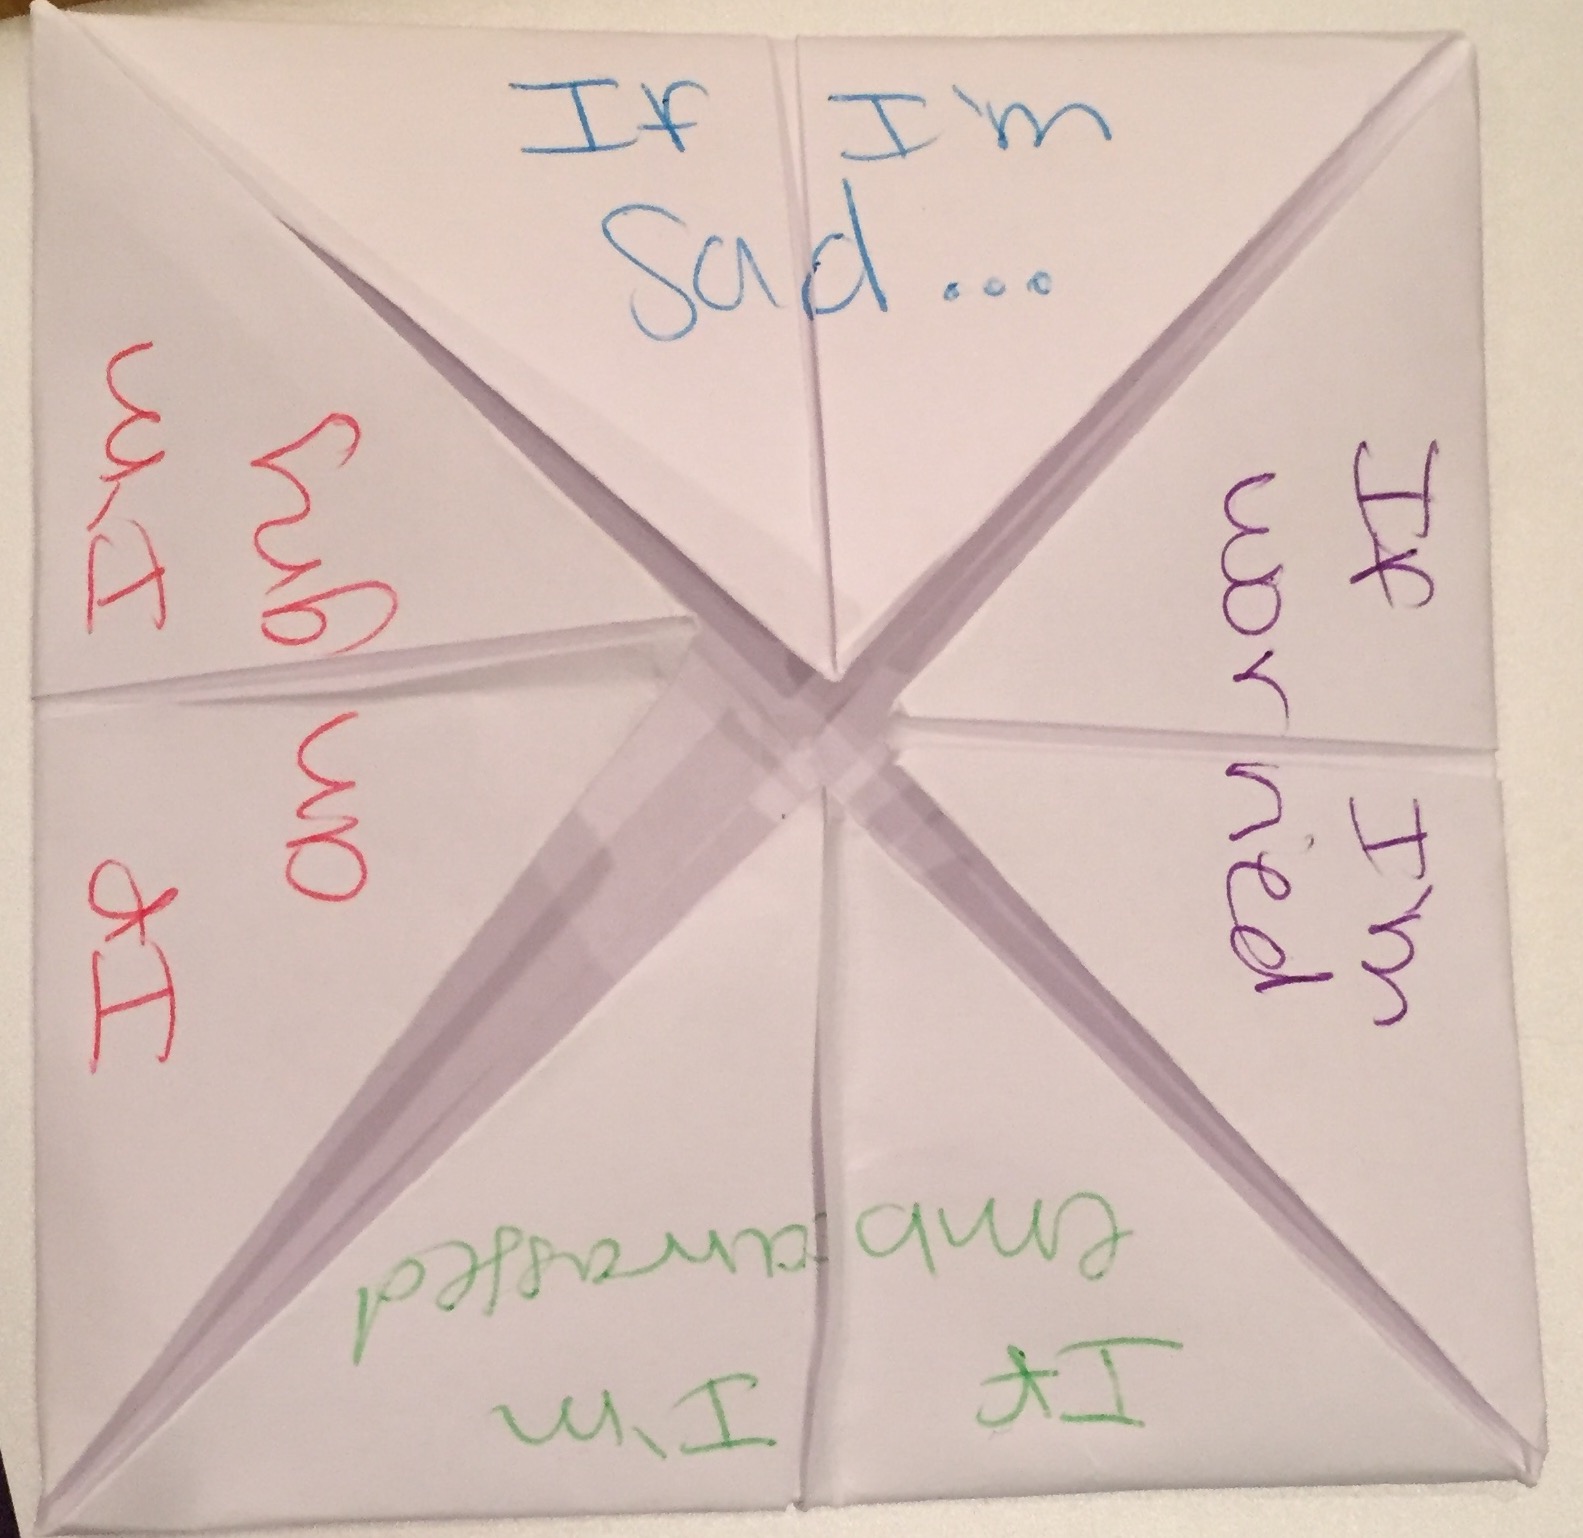
(2) Coping With Divorce “Cootie Catchers”

I’m sure we all remember making “cootie catchers” or “fortune tellers” as children, and it’s still a hit with the kiddos! {If you don’t remember how to make them, check out this YouTube tutorial.} I begin this activity by talking about the different feelings we might have when thinking about our parents’ divorce. The group members usually identify emotions such as sad, angry, embarrassed, lonely, and worried.

IMG_6448

The students then write four of those feelings on the outside squares of their “cootie catchers.” {For 3rd grade, I made them in advance, but I had 4th grade fold them with a little help from me.} On the inside of the “cootie catcher,” they write “If I’m {insert feeling here}” for each of the emotions they listed on the outside.

FullSizeRender 18

Finally, under each flap, the students write 2 coping skills for each feeling.

IMG_6450

This activity seemed to be a group favorite, and I’ve actually seen my students using their “cootie catchers” in the hallway when they are upset!

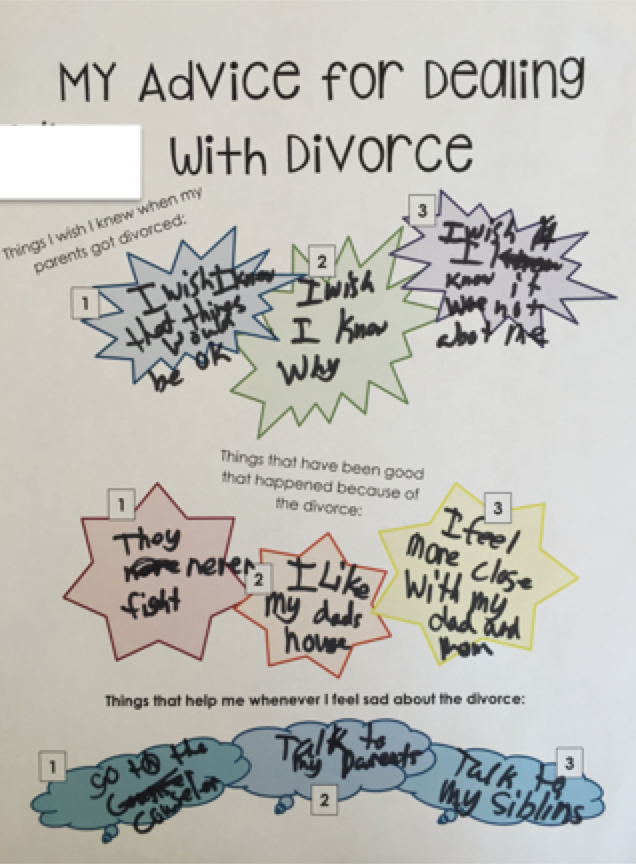
(3) Divorce Advice Pages

This activity gives students an opportunity to help other kids who are going through similar things in their families. Each sheet has 3 sections: “Things I wish I knew when my parents got divorced, “Things that have been good that happened because of the divorce,” and “Things that help me whenever I feel sad about the divorce.”

Screen Shot 2016-03-23 at 4.39.24 PM

Students write 3 things for each category, and we use this page to spark discussion among group members. I tell the students that copies of their advice pages will be put into a binder so that other kids who are upset about their parents divorcing can look at them and hopefully feel better. The group members really liked the idea of helping others, and they didn’t even realize that this activity was helping them too!

I’ll be posting this worksheet as a freebie on my TpT store soon!

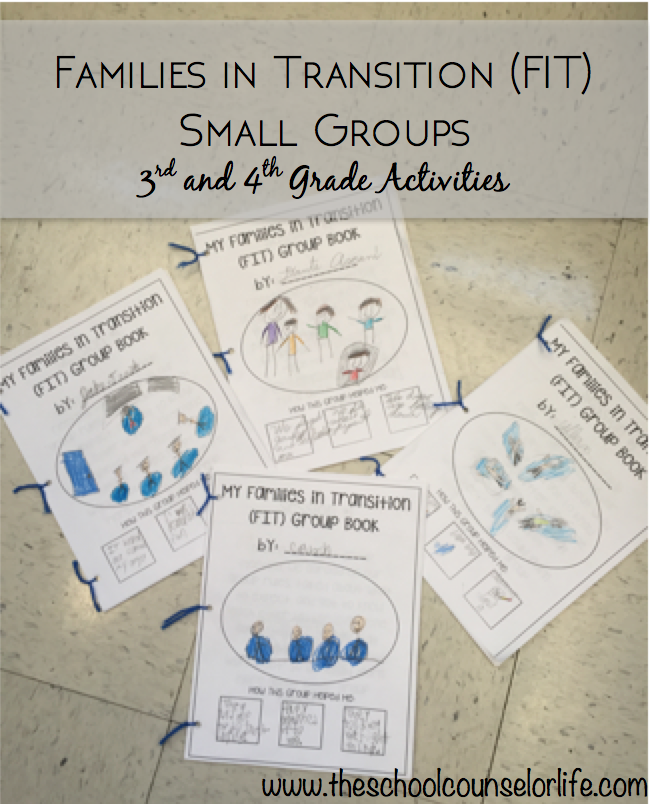
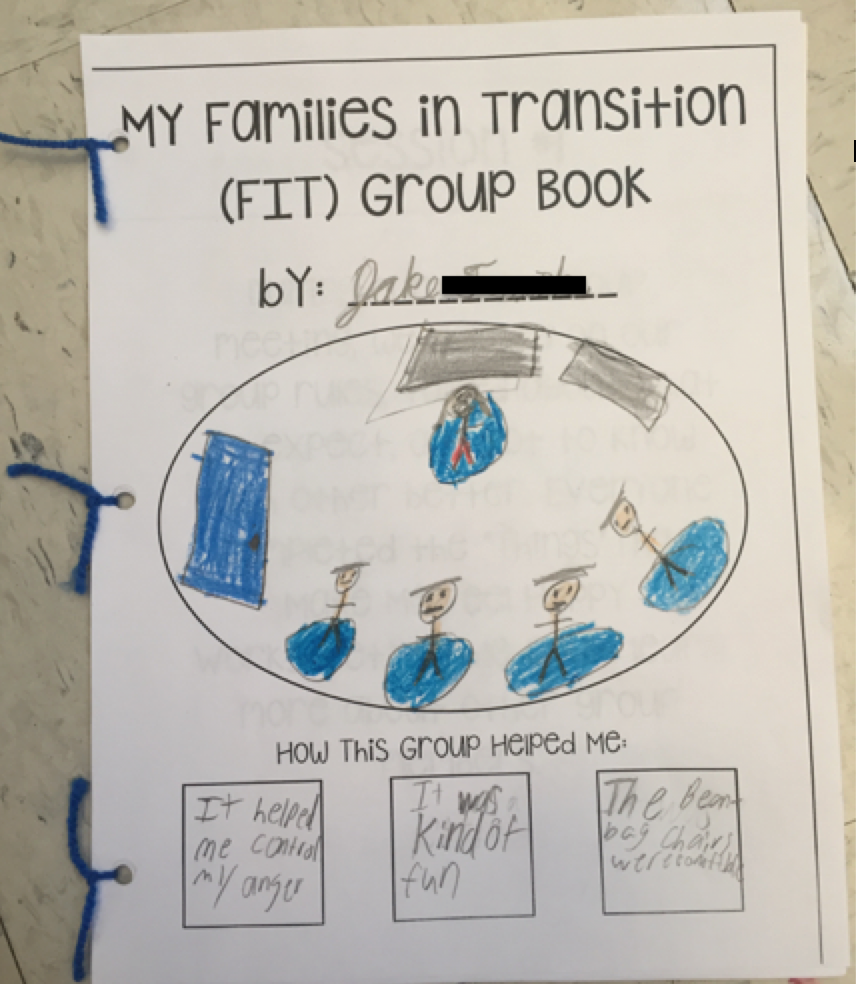
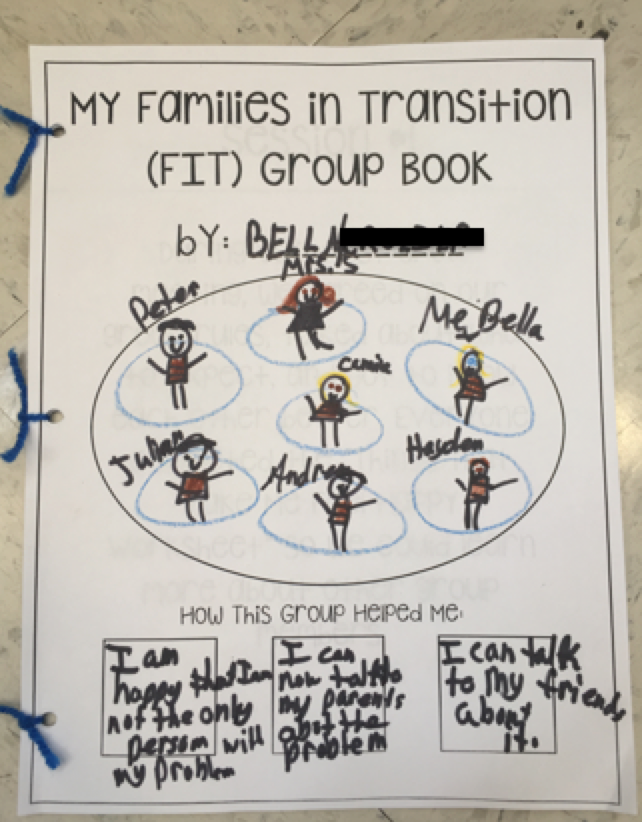
(4) FIT Group Books – Termination Activity

After each session, I collected everyone’s check-in sheets, as well as any other papers we generated during the session {drawings, worksheets, etc.}. During the very last session, I give the students back their work in the form of a book to take home. I also include a page for each session describing what they did that day {which is especially good for the sessions that didn’t have any handouts}. I encourage the students to share these books with their parents so they can what we did during group.

Screen Shot 2016-03-23 at 4.38.33 PM

IMG_6440

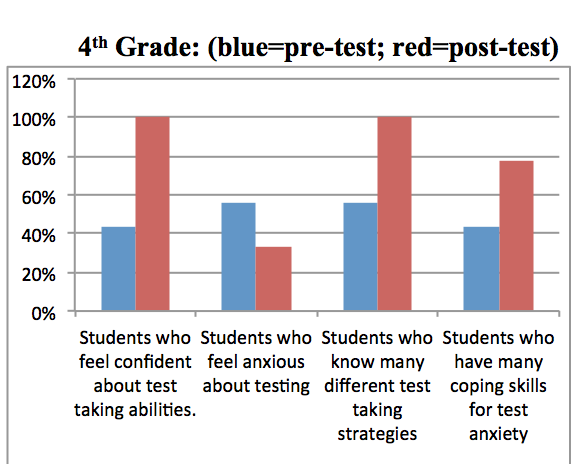
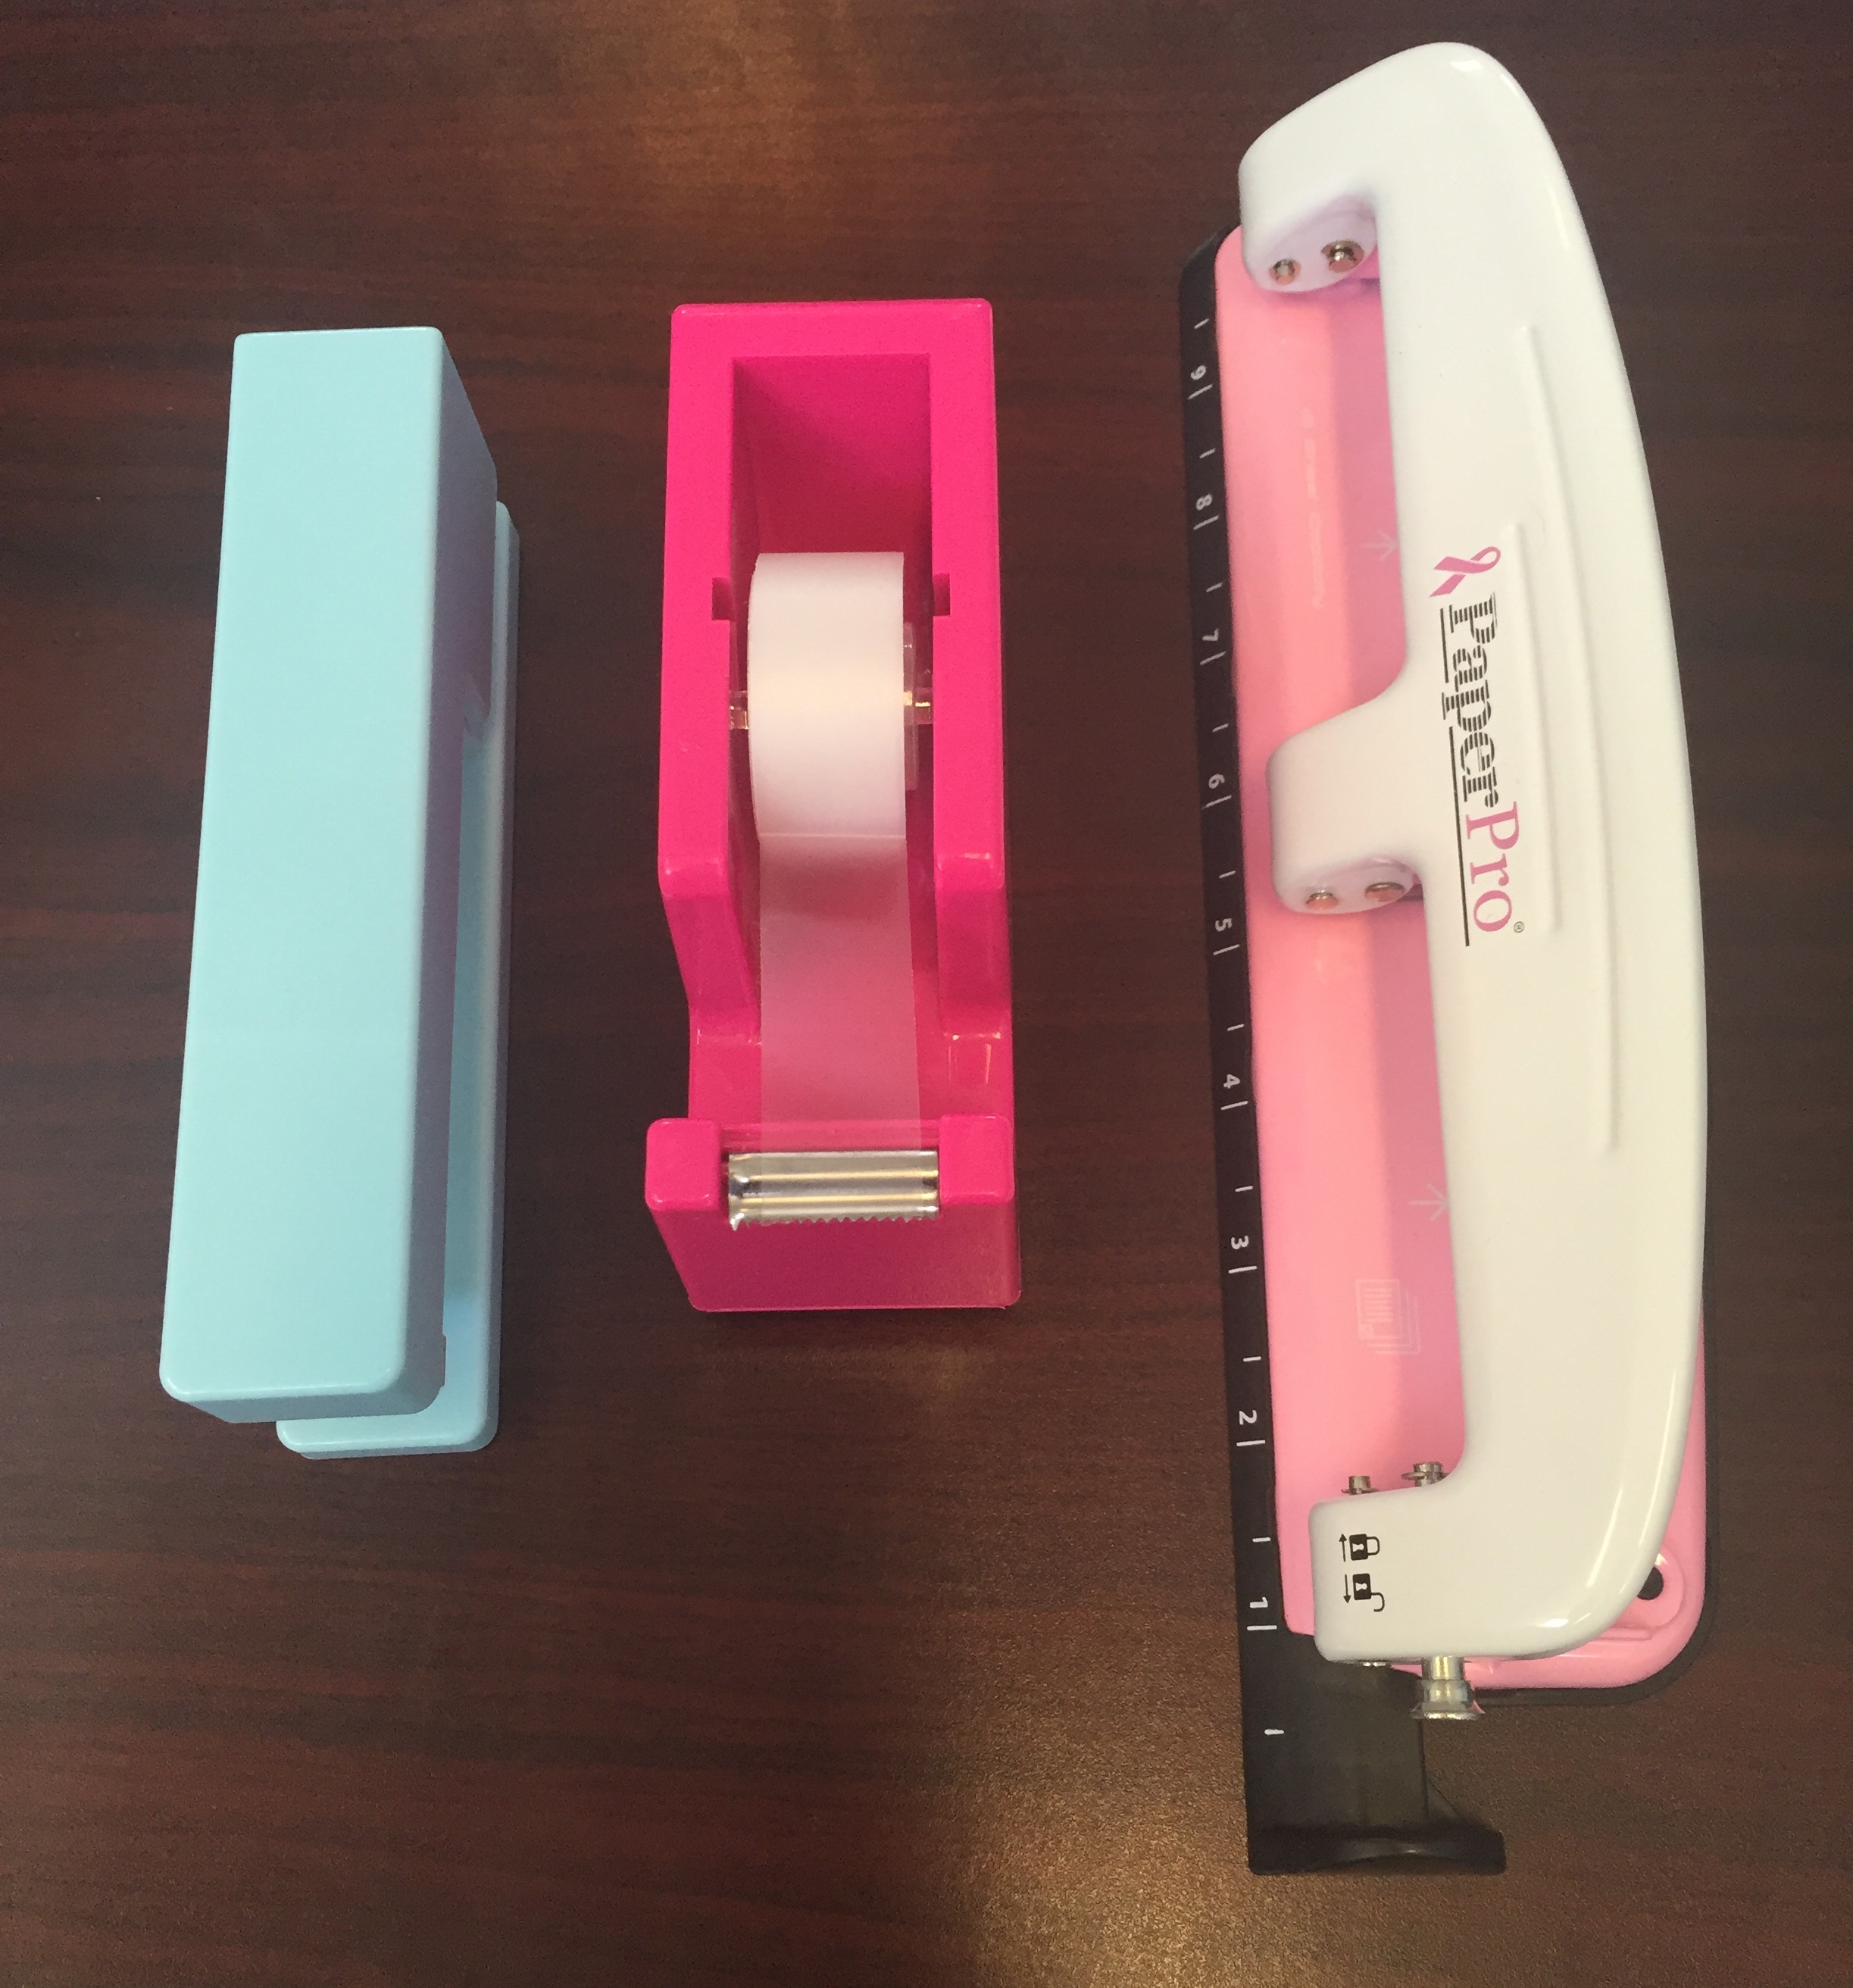
The group members decorate a book cover, complete with a hand drawn picture of the group and 3 ways the group helped them. Then, we punch holes in the pages, and tie them together with yarn. We finish out with a discussion of everyone’s favorite things about the group, and I remind them that they can still come talk to me after the group ends. I also give a short anonymous survey at the end for my own data collection.

Screen Shot 2016-03-23 at 4.37.55 PM

{At first, I wasn’t sure why most students were drawing the group members with blue orbs around them, then I realized that they were drawing the blue bean bag chairs that we always sit on!}


Screen Shot 2015-10-12 at 8.12.23 PM

Cyber Bullying and Cyber Safety Lessons {Part III}

Screen Shot 2016-03-06 at 12.45.19 PM


Part I of this series: 5th Grade Lesson on Cyber Bullying and Cyber Safety

Part II of this series: 6th Grade Lesson on Cyber Bullying and Cyber Safety


To conclude this series, I will be telling you about my 7th grade lesson on cyber bullying and cyber safety.

I begin by splitting the students into small groups, and each group is given a piece of paper and a marker. Without introducing the topic, I tell the students that they will be watching a series of short video clips. In between each video, the groups will discuss what they saw and write down their thoughts about the current segment.

The video clips I play center around sexting, although I do not use that terminology with the 7th graders {primarily because I work in a Catholic school, and my boss would not be happy with that}. They definitely understand the content even without that specific label.

The first clip is called, “Choose What Happens Next.” In this video, a girl received a text message from a guy asking to send him a “hot pic.” At the end, the audience gets to choose whether or not she sends it. A cool thing about this series is that when you click on the “yes” or “no” buttons at the end, you are taken to the next video.

Screen Shot 2016-03-11 at 10.22.08 AM

Of course the students always say that she shouldn’t send it, so I click “no,” which takes us to the 2nd clip. The next one {“Don’t Send“} shows what would happen if she decided to send it. The clip ends with the boy receiving the picture and deciding whether or not to show his friends. Again, we are given the decision for him to send or not send.

Screen Shot 2016-03-11 at 10.25.50 AM

After clicking on “no” again, the 3rd clip {Out of Your Hands} begins, which starts with a screen that says, “Sorry. You no longer have a choice.” In this video, we see the boy show his friends, who want him to text it to a friend who isn’t present. The question at the end is, “Should he pass it on?”

Screen Shot 2016-03-11 at 10.31.04 AM

Clicking on “no” takes us to the final video {also titled Out of Your Hands}. The boy decides to send the picture to others, because it is no longer in our control or the girl’s control. We then see how quickly something like this can spread to other people. Students at school begin to receive the picture on their phones, and the girl’s mother even gets it in an e-mail. I think this is a particularly powerful way to show what could happen if they send inappropriate pictures to others, even people they care about.

Screen Shot 2016-03-11 at 10.33.40 AM


We process the video clips as a class, and the small groups are given a chance to share the thoughts they wrote down. Then, we transition into a discussion on internet safety, continuously tying in the video clips.

Finally, we talk about cyber bullying, which is mostly a review from my 5th and 6th grade lessons. The 7th graders are able to take that information and talk about it more openly and in a more mature fashion than they were capable of doing as 5th and 6th graders. To drive home the point, I show one final video clip. This video shows a girl at a talent show saying horrible things about another classmate in a brutally honest manner. The tag line of this clip is “If you wouldn’t say it in person, why say it online?” You can view the video here.

Screen Shot 2016-03-11 at 10.44.04 AM


It is so necessary in today’s world to have these discussions with children and teens, and I really believe that my cyber bullying and cyber safety lessons stick with my students. To reinforce the lessons, I also post resources in my weekly newsletter column for the parents to be able to discuss these topics with their children.


Screen Shot 2015-10-12 at 8.12.23 PM

Cyber Bullying and Cyber Safety Lessons {Part II}

Screen Shot 2016-03-06 at 12.45.02 PM


Part I of this series: 5th Grade Lesson on Cyber Bullying and Cyber Safety


I begin my 6th grade lesson with a review of the things we covered in 5th grade, including ways to stay safe on the internet, the differences between meanness and bullying, and the definition of cyber bullying. As mentioned in my previous post, the video I show to my 5th graders is so powerful that the 6th graders recall it immediately.

The rest of this lesson focuses on the effects of bullying, particularly cyber bullying. I show a video of Lizzie Velasquez, a woman who experienced bullying and cyber bullying as a result of a rare syndrome that affects her outward appearance and health. In this video, Lizzie speaks about her experiences and how she did not let the cyber bullies define her. She chose to define herself, and as a result was a happier person. You can view this inspirational video here.

Screen Shot 2016-03-08 at 4.14.03 PM


I initiate a group discussion about the video and about the major consequences of bullying. Then, we begin our activity. Each student is given a blank piece of paper and a marker. I instruct the students to write the labels they think other people give them, sometimes without even knowing them.

6thlessonphoto

Some responses I got this year include “dumb jock,” “stuck up,” “fatty,” and “spoiled rich kid.” One of the more interesting labels that one student wrote was “always happy,” which she viewed as a negative because her peers expected her to be happy all of the time, and she felt as if she wasn’t allowed to ever be sad or angry. Interesting! This led into a great discussion on stereotypes and judging others, which we tied back into the main topic of cyber bullying.

In the final part of the activity, the students are told to cross out the labels that others give them and replace those labels with their own definitions of themselves. “Dumb jock” turned into “smart and athletic,” “stuck up” turned into “quiet and shy,” “fatty” turned into “cuddly,”  and “spoiled rich kid” turned into “grateful for everything I have.” Pretty insightful for a group pf 11 and 12 year-olds!

6thlessonphoto2

We talk about the activity and close out with a review of everything brought up in the lesson.


Part III {the final part} of this series will be coming on Friday!


Screen Shot 2015-10-12 at 8.12.23 PM

Cyber Bullying and Cyber Safety Lessons {Part I}

Screen Shot 2016-03-06 at 12.44.34 PM


This week, I will be sharing my cyber bullying and cyber safety lessons that I use with my middle school students. Today’s post will be my 5th grade lesson. Enjoy!


The cyber safety portion of my 5th grade lesson begins with a truly great video from the UK Centre for Child Exploitation and Online Protection. The video shows a girl who posts a giant sign outside her house with all of her personal information, then leaves her door open. An older man sees the sign, and writes down her information, then walks into her house. He begins taking her photos off the wall and placing them in his bag, then he starts to talk to her, lying about what he looks like. At the end, it’s revealed that all of those events took place on the internet, not in person, and the video emphasizes the fact that people are more careful in the real world than in the online world. You can see the video here.

Screen Shot 2016-03-06 at 2.54.56 PM

I process the video with the group, and we begin our discussion on internet safety. I ask the students to raise their hands if they have a cell phone, laptop, or tablet that they can use to access the internet, and of course, all of the students raise their hands. We talk about the different apps that the students use, such as Instagram, Snapchat, Musically, and ooVoo {but not Facebook, because apparently that’s for old people 😛 }, as well as the safe ways to use those applications.

There are 3 facts I share with my students that they always seem to be shocked by: (1) That Snapchat legally owns all of the pictures that are “snapped,” and they are not truly gone forever; (2) If they have Instagram profiles that are set to private but have followers who they have never met before, those followers can save or share their pictures; (3) If they have pictures of themselves in their school uniforms on social media {and again have people following them that they’ve never met, or if they have a public profile}, people can easily figure out where they go to school.

After talking about internet safety, we transition our discussion to cyber bullying. First, we define bullying and meanness {which sometimes they don’t realize are very different things}. After we define bullying, we talk about how cyber bullying is different. Cyber bullying can happen 24/7, people who bully online can easily recruit other people to join in, and people are more likely to say awful things on the internet than they are to say them in person.

We also talk about what they should do if they or someone they know is being bullied in the digital world. I’ve found over the years that children and teens initially think they should delete unkind messages they receive because they are afraid they will get in trouble for having those messages on their phones. I emphasize the importance of SAVING ALL EVIDENCE OF CYBER BULLYING. In my eyes, the one benefit of cyber bullying is that there is proof it is happening. The bully cannot deny his or her actions, and school administrators don’t have to wonder who to believe if students screenshot the evidence.

Overall, I think this lesson is really effective. Student participation and engagement when I implement this lesson is so high because the topic is extremely relevant to their lives. In fact, my students from last year, are still talking about this lesson a year later, which tells me it had a significant impact.


On Wednesday, I will post part II of this series, which will be my 6th grade lesson on cyber bullying {with a cyber safety review}.


Screen Shot 2015-10-12 at 8.12.23 PM